> ## Documentation Index
> Fetch the complete documentation index at: https://docs.slipway.sh/llms.txt
> Use this file to discover all available pages before exploring further.
# Quickstart
> From zero to a live preview URL in about five minutes.
You'll need a GitHub repo with a working `Dockerfile`. By the end, a push or pull request gives you a live URL.
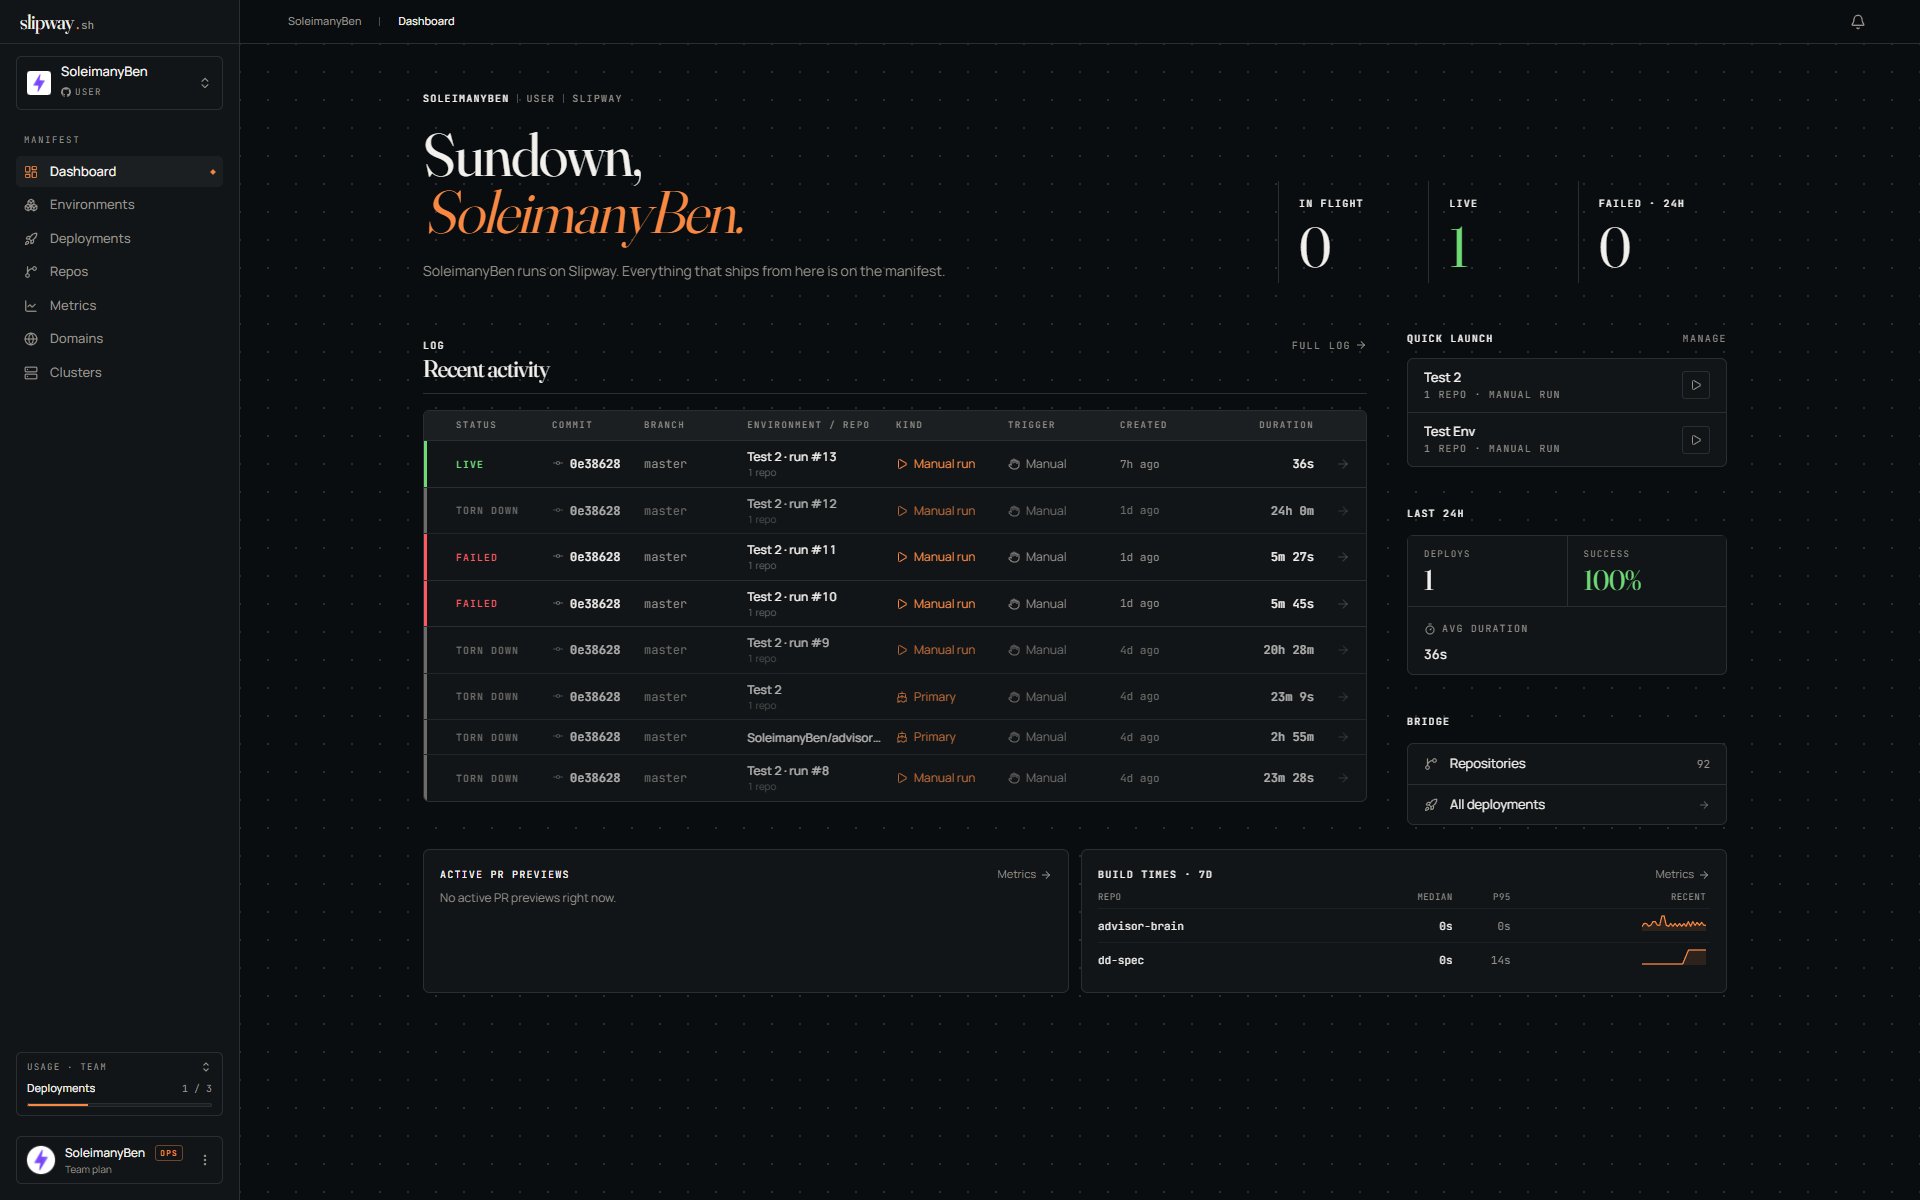 New here? Your dashboard shows a **Getting started** checklist that walks you through these same steps — connect a repo, deploy it, open your live app — and ticks each one off as you go.
## 1. Sign in
Sign in with GitHub. Slipway uses GitHub for identity — there are no passwords. First time in, you'll be prompted to install the GitHub App.
## 2. Install the GitHub App
Click **Install Slipway GitHub App** and choose which account and repositories to grant. You can scope it to a single repo while you try things out; repos you don't grant stay invisible to slipway.
When you come back, slipway creates an org named after the GitHub account and lists its repos under **Repos**.
**One org per GitHub account.** Re-installing on the same account signs you back into the same org. Installing on a different account creates a different org.
## 3. Pick a plan
Slipway routes you to the plan picker. Plans include a 30-day free trial with no credit card required — adding a card during the trial is optional, and nothing runs after the trial until one is on file. Until you pick a plan the org is read-only: you can browse, but deploys are blocked. See [Plans & pricing](/organization/plans).
## 4. Add `slipway.yaml`
Create a file called `slipway.yaml` at the root of your repo. The smallest valid spec:
```yaml slipway.yaml theme={"system"}
version: 1
services:
web:
build:
context: .
ports:
- { port: 3000, public: true }
healthcheck:
readiness: { http: { path: /healthz, port: 3000 } }
```
This builds the `Dockerfile` at the repo root, exposes port `3000` publicly, and waits for `/healthz` to return 2xx before going live. Adjust the port and path for your app — the [Services reference](/slipway-yaml/services) covers every field.
No `slipway.yaml`? Slipway can deploy straight from a committed `docker-compose.yml` instead. See [the spec overview](/slipway-yaml/overview).
## 5. Deploy the repo
As soon as your plan is picked you land on **Deploy a repo** (it's also one click away from the dashboard, the Repos page, and the Environments page). Pick your repository, keep the default branch, and hit **Deploy** — or skip to the dashboard and come back later.
That one button creates an environment for the repo, starts the first build, and drops you on the live deployment page. Slipway validates your spec along the way; if `slipway.yaml` is missing or malformed, it tells you exactly what's wrong before anything runs.
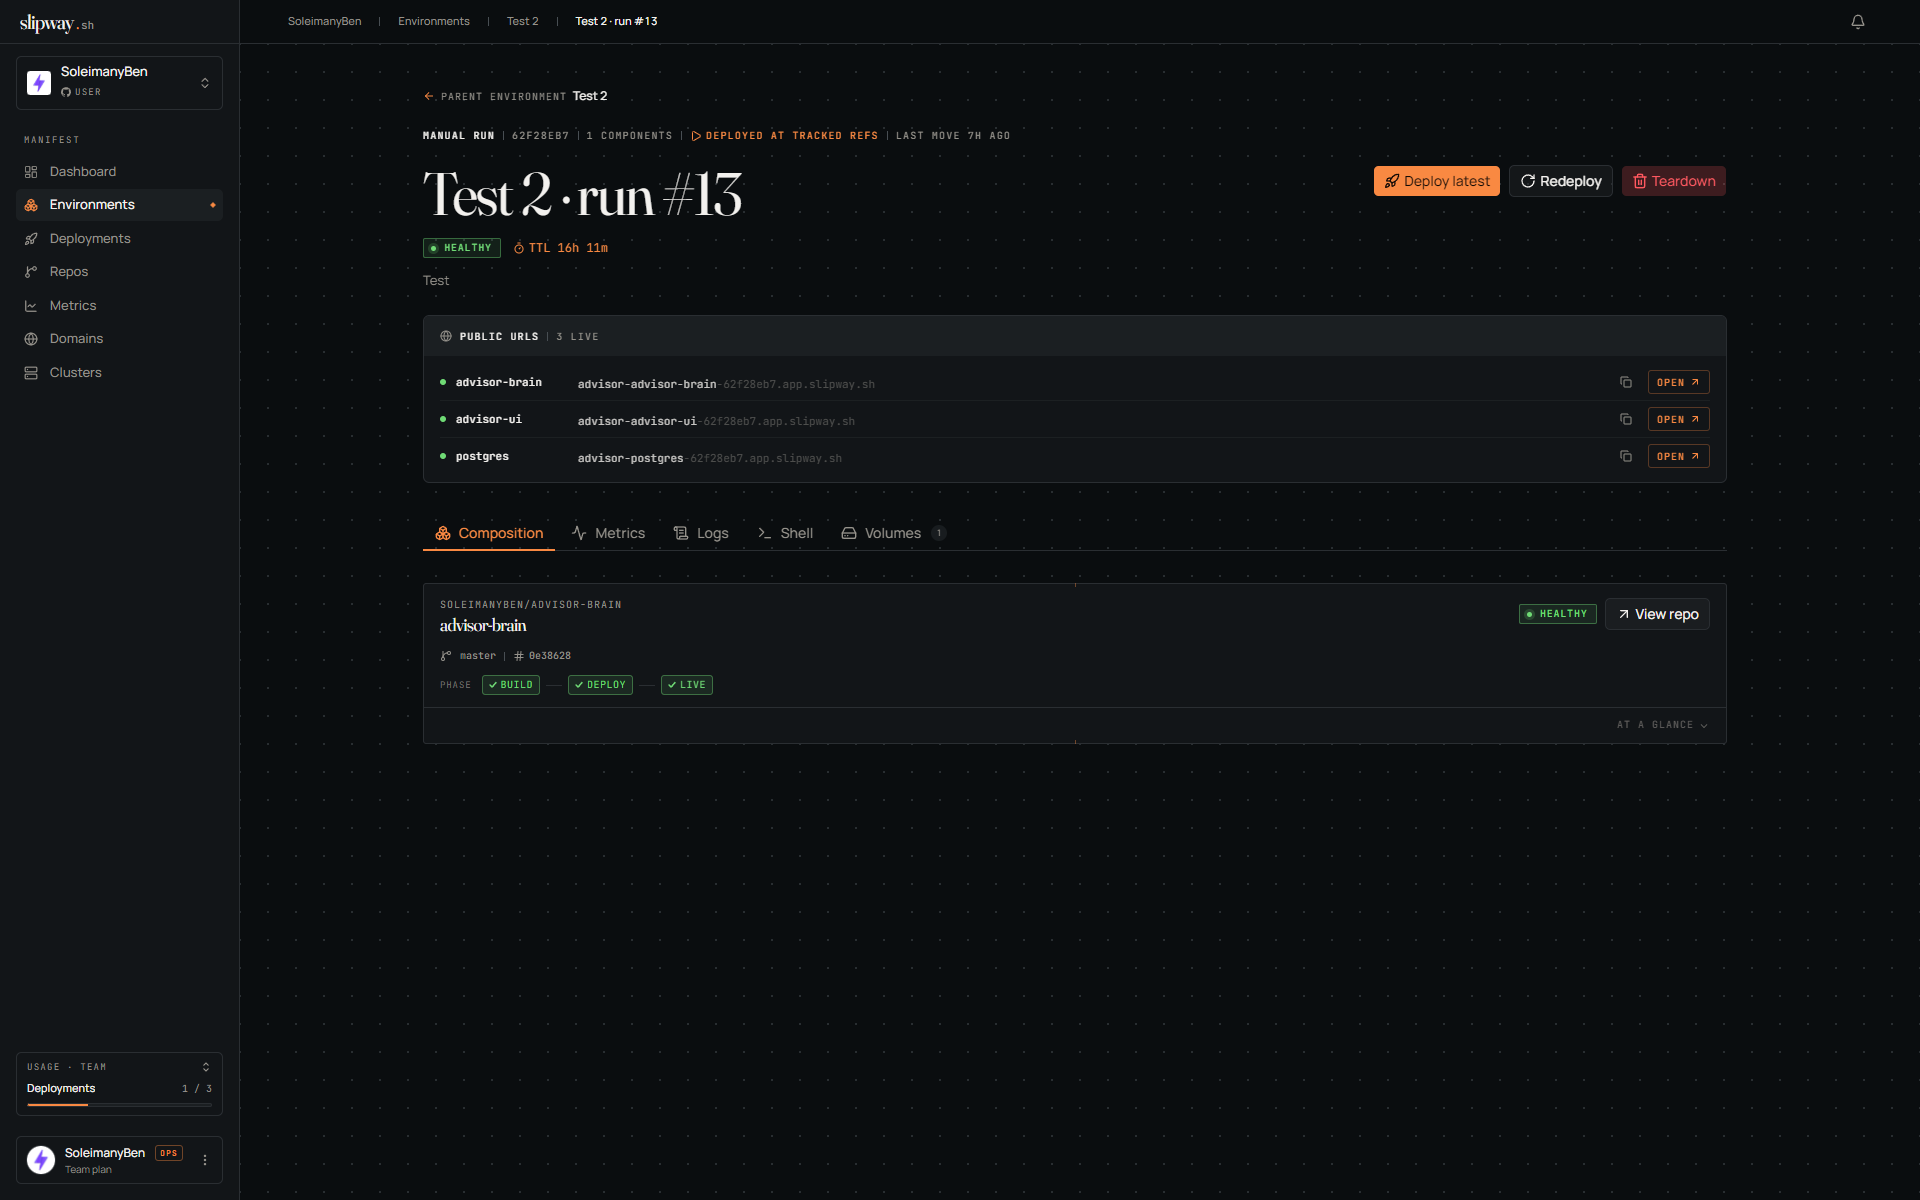
The phase ladder on the deployment page tracks `build → deploy → live`.
New here? Your dashboard shows a **Getting started** checklist that walks you through these same steps — connect a repo, deploy it, open your live app — and ticks each one off as you go.
## 1. Sign in
Sign in with GitHub. Slipway uses GitHub for identity — there are no passwords. First time in, you'll be prompted to install the GitHub App.
## 2. Install the GitHub App
Click **Install Slipway GitHub App** and choose which account and repositories to grant. You can scope it to a single repo while you try things out; repos you don't grant stay invisible to slipway.
When you come back, slipway creates an org named after the GitHub account and lists its repos under **Repos**.
**One org per GitHub account.** Re-installing on the same account signs you back into the same org. Installing on a different account creates a different org.
## 3. Pick a plan
Slipway routes you to the plan picker. Plans include a 30-day free trial with no credit card required — adding a card during the trial is optional, and nothing runs after the trial until one is on file. Until you pick a plan the org is read-only: you can browse, but deploys are blocked. See [Plans & pricing](/organization/plans).
## 4. Add `slipway.yaml`
Create a file called `slipway.yaml` at the root of your repo. The smallest valid spec:
```yaml slipway.yaml theme={"system"}
version: 1
services:
web:
build:
context: .
ports:
- { port: 3000, public: true }
healthcheck:
readiness: { http: { path: /healthz, port: 3000 } }
```
This builds the `Dockerfile` at the repo root, exposes port `3000` publicly, and waits for `/healthz` to return 2xx before going live. Adjust the port and path for your app — the [Services reference](/slipway-yaml/services) covers every field.
No `slipway.yaml`? Slipway can deploy straight from a committed `docker-compose.yml` instead. See [the spec overview](/slipway-yaml/overview).
## 5. Deploy the repo
As soon as your plan is picked you land on **Deploy a repo** (it's also one click away from the dashboard, the Repos page, and the Environments page). Pick your repository, keep the default branch, and hit **Deploy** — or skip to the dashboard and come back later.
That one button creates an environment for the repo, starts the first build, and drops you on the live deployment page. Slipway validates your spec along the way; if `slipway.yaml` is missing or malformed, it tells you exactly what's wrong before anything runs.
The phase ladder on the deployment page tracks `build → deploy → live`.
 Deploying more than one repo together, or a PR-preview-only setup with nothing permanently running? Use the environment composer instead (**Environments → New environment**) — see [Environments](/environments/overview).
## 6. Push and open pull requests
When the status reaches **healthy**, the deployment page shows the public URL.
From here the repo behaves the way you'd expect:
* **Push to the tracked branch** and slipway rebuilds and redeploys it automatically. The environment header shows whether it's set to **auto-update** or **pinned**.
* **Open a pull request** and slipway builds a separate preview with its own URL, torn down when the PR closes. If PR comments are on (the default), the URL is posted into the PR thread.
## Next steps
Wire `DATABASE_URL`, `API_KEY`, and friends in without committing them.
Serve previews under your own domain instead of the default.
Auto-deploy, PR comments, and preview authentication.
Triggers, manual deploys, and the deployment lifecycle.
Deploying more than one repo together, or a PR-preview-only setup with nothing permanently running? Use the environment composer instead (**Environments → New environment**) — see [Environments](/environments/overview).
## 6. Push and open pull requests
When the status reaches **healthy**, the deployment page shows the public URL.
From here the repo behaves the way you'd expect:
* **Push to the tracked branch** and slipway rebuilds and redeploys it automatically. The environment header shows whether it's set to **auto-update** or **pinned**.
* **Open a pull request** and slipway builds a separate preview with its own URL, torn down when the PR closes. If PR comments are on (the default), the URL is posted into the PR thread.
## Next steps
Wire `DATABASE_URL`, `API_KEY`, and friends in without committing them.
Serve previews under your own domain instead of the default.
Auto-deploy, PR comments, and preview authentication.
Triggers, manual deploys, and the deployment lifecycle.